Haven’t we all had that moment when we couldn’t remember where we parked our car?
Whether you’re on the road or at home (for those who don’t have a garage), it can be helpful to have Home Assistant save the current location of your car.
First, we need three helpers: two text input helpers and one template sensor.
We’ll call the text input helpers car_longitude and car_latitude. The GPS values will be stored here later. We’ll call the template sensor ‘Car Location’. This will be used later to display the location of the car on a map.
We’ll create the template sensor via configuration.yaml.
To do this, add the following lines to configuration.yaml:
template:
  - sensor:
      - name: "Car Location"
        unique_id: car_location
        state: "home"
        attributes:
          latitude: "{{ '%.6f' | format(states('input_text.car_latitude') | float(0)) }}"
          longitude: "{{ '%.6f' | format(states('input_text.car_longitude') | float(0)) }}"
          gps_accuracy: 1
Now let’s create an automation. I’ve called it ‘Save parking space’.
The trigger is the moment my smartphone loses its connection to Android Auto. In other words, when I get out of the car.
I then wait until my smartphone’s GPS accuracy is below 10.
Then I save the longitude and latitude in the helpers I created earlier.
alias: "Save parking"
description: ""
triggers:
- type: not_connected
device_id: dc58cc5bcfe3fef831a864f2c7c38f9a #YOUR SMARTPHONE
entity_id: 144b26f09533717e576cb63f1156d1a3 #ANDROID AUTO
domain: binary_sensor
trigger: device
conditions: []
actions:
- wait_for_trigger:
- trigger: numeric_state
entity_id:
- person.christopher #YOUR PERSON ENTITY
attribute: gps_accuracy
below: 10
timeout:
hours: 0
minutes: 0
seconds: 30
enabled: true
- action: input_text.set_value
metadata: {}
data:
value: "{{state_attr('device_tracker.motorola_razr_60_ultra_2', 'latitude') }}" #LATITUDE OF YOUR SMARTPHONE
target:
entity_id: input_text.car_latitude
- action: input_text.set_value
metadata: {}
data:
value: "{{state_attr('device_tracker.motorola_razr_60_ultra_2', 'longitude') }}" #LONGITUDE OF YOUR SMARTPHONE
target:
entity_id: input_text.car_longitude
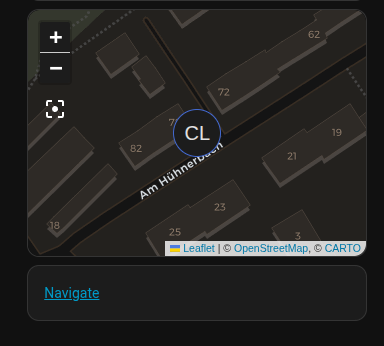
mode: singleFinally, we add a map to our dashboard using the entity ‘sensor.car_location’:
type: map
entities:
  - entity: sensor.car_location
theme_mode: dark
default_zoom: 18
Bonus
You can create a button to navigate to your car using Google Maps.
To do this, add a ‘Markdown map’ to your dashboard and use this content:
[Navigate](https://www.google.com/maps?q={{ states('input_text.car_latitude') }},{{ states('input_text.car_longitude') }}) In the end, it looks like this (CL stands for ‘car location’):